
Here's another shot of the living room. You can see the rather thrown-together cabinet in the corner. This hides the main plumbing stack, a heating vent to the bathroom, and the main electrical panel. The plan is to remove this cabinet and relocate the electrical panel.
Some of what was done on day 1 was just clean-up, which included removing old curtain rods, damaged horizontal blinds, nails poking out of casings, and dozens of ceiling hooks.


One thing we did to make wall repairs easier, was remove the chair rail and cove mouldings from the tops of the tongue-and-groove wainscoting. All the original mouldings were carefully removed, and will be reinstalled. In this picture, we had also removed the HVAC box in the corner.

Arch Demo
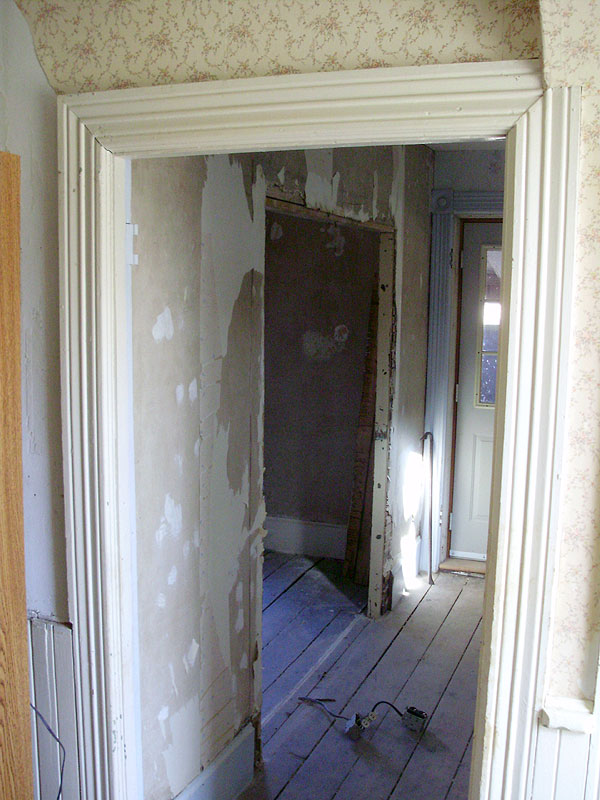
While Pierre got to work scraping and peeling wallpaper in the living room, I tackled the archway. The patched mouldings used as baseboard on both sides were removed, and then the drywall was taken out in chunks. When I had this section removed, I spotted an original drywall label which dates to the 1920s.

I found it quite surprising that this archway has been blocked off for this long. According to the label dates, this drywall has been here since around 1926! This drywall dates almost to when my house was built!

Before I go much farther, and before I forget, I want to point out that this hallway wall was covered in 1/8" plywood, which was then covered-over with wallpaper. Behind this was the original plaster and remnants of more wallpaper.

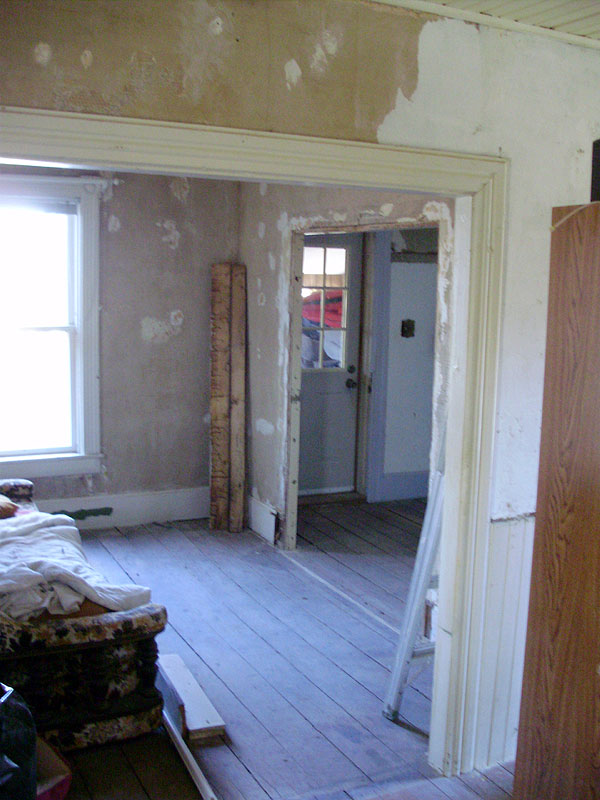
Opening this archway made a HUGE difference. The whole house feels more open, and there's a lot more light in the rooms.

The two wall outlets will be relocated.


The most significant advantage that we gained by removing this wall, however, is the beautiful and unobstructed view of the beautiful staircase! Pierre plans to have this room be an office/library, and he wants to have his desk facing the staircase. I think that's a wonderful idea!

I also took down the acoustic tiles. I can't understand why they were put up there in the first place. The ceiling underneath looks fine. The adhesive will be a real pain to remove. Not visible in the photo is the "popcorn" texture on the ceiling. None of us is a fan of this texture (which is also on the triangle wall of the staircase, and going up the stairs, so we plan to scrape it and skim-coat it. That's not going to be fun.

These last shots are mainly just "after day 1" photos from the main floor. You can see that a lot of the wallpaper was removed, and we cleaned up all the dirt and debris.

The majority of the wallpaper came off easily, but this one back wall (on the left) was a real bear to get off. Pierre spent the better part of the day on this one wall. Pierre also demolished the shoddily constructed wall bookcase, which was at one time a window. Behind it is the small room with stairs that lead down to the basement.

In the big pile you can see the big sheets of thin plywood that were over the hallway walls.

Plywood and coat rack removed (next to front door). The grey/beige section is the plaster, and the white is the textured wall going up the stairs.

Wallpaper mostly gone.


While Pierre and I worked inside, Angie, her mother, and her father were hard at work clearing a lot of the shrubbery, small trees and branches around the house. They also piled garbage in the back garage for the "free dump day" coming up near the end of April. With the shrubs and weeds gone, you can also see the damaged foundation on the kitchen addition. There are plans to remove and rebuild this corner (the foundation guy said it can be done).

On the original portion of the house, you can see that the original stone foundation has had a coat of cement slapped over it, and this will have to come off. Angie's father was lucky to find an EXCELLENT historic masonry guy who has been working over a week repointing the foundation in period correct lime mortar. He wants the foundation repaired properly, which will involve digging around the house to expose the stonework. You'll see lots more of the foundation in the next post.

Compare the shots above with the two "before" photos and you'll see a big difference! There's still a lot more tree-trimming and vine removal left to do.


Yikes! Be careful with that drywall! It most likely has asbestos in it since it is fireproof!
ReplyDeleteI'm not so sure about that. Regular drywall is also "fireproof". It's basically plaster (stone) wrapped in paper. In either case, it's too late. The drywall was smashed-up and thrown away months ago. There were only these couple of sheets of it. Asbestos is mostly dangerous if you let a lot of it accumulate in your lungs. You breathe-in asbestos just by walking anywhere outside.
Delete