
At this point, I had done just the Dining Room, and this is ALL the hardwood I had on hand for repairs:

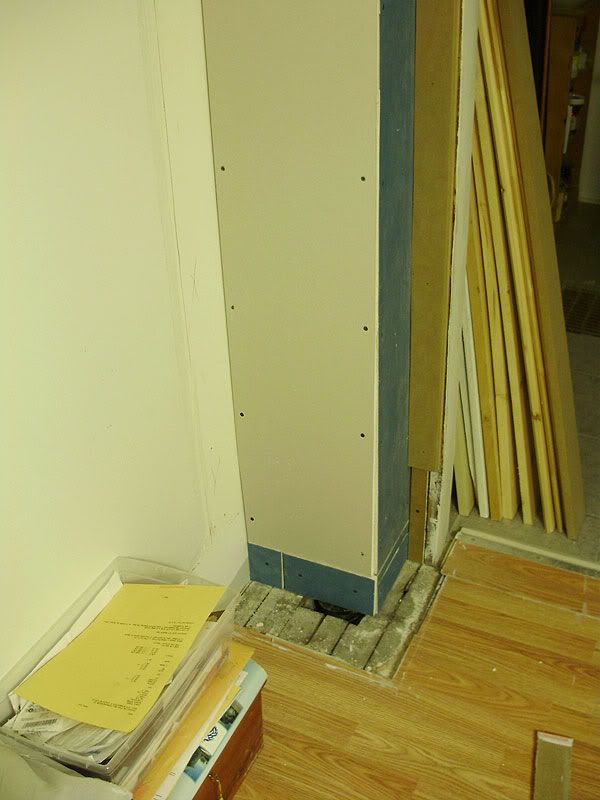
But keep in mind that I still had all these repairs left to do:


As well as a few other small areas.
I decided to start with what I could use out of the really scrappy pieces. One was perfect for this repair:


It had a broken back half, but was wide enough to cover the repair (the portion near the wall will be completely hidden by the baseboard).
Next, I tackled this guy:

Note how they passed the wire for the exterior plug.

Rather than reuse the already huge hole that they made for the other plug, they just drilled a series of holes (one which goes clear to the outside of the house for the plug box), and then just patched over it with drywall. For now, I left that one alone, since I'll need to rewire the exterior box, and it's around -25C (-13F) outside right now.
While fixing the floor, I also had to rewire and re-secure the electrical box. As with every other one in the house (with VERY FEW exceptions), it was crooked, and rattly. You can KIND of see that the plate and the outlet fitting aren't flush.
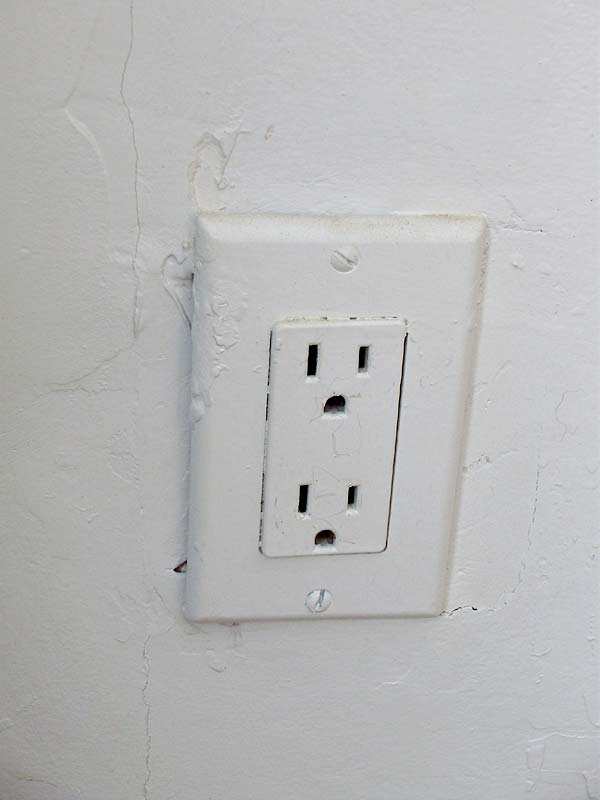

You can never really tell in photos how crooked something really is, so here's the same photo, but with the cover plate next to it. The plate is around 1/4 inch thick. The box is flush on the right side, but about 1/2 inch out on the left. FAIL. You really need the metal electrical box to be as flush as possible with the drywall. Even if it's sticking out a hair from the drywall, that's fine, but it can't be this crooked. It was also BARELY attached to the wood. This box was only secured to the exterior t-g wood, and not to a stud (which is fine if it's SOLID, which it wasn't).

I could not get a good grip on the wood from the existing holes in the box, so I had to drill 2 new ones, closer to the edge of the box. This is pretty easy, you just need a drill with a 3/16" bit. The finished box is now sturdy, flush, and unfortunately in need of a bog patch job because the huge hole that they had made and patched, cracked.

Here's another shot:

The next repair that really needed attention was the old duct work hole in the Office floor. If you remember, last year, I moved the duct work over into the corner by about a good 7-8 inches. This gave me a lot more space in the room (wall space), but left me with 2 large holes to patch. One was in the ceiling: https://lh4.googleusercontent.com/-4c1dIrVONNI/Tzhgxt8R8NI/AAAAAAAAAJY/Ghuik90hxo4/s800/P2020164.jpg, and the other was in the floor:

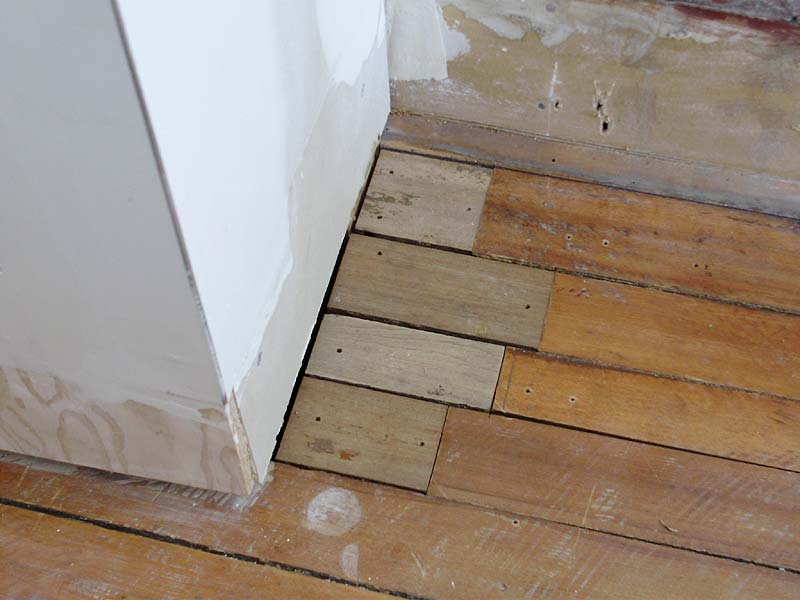
I started by cutting out a staggered pattern for the boards.

Because this is the exterior wall against the foundation, I had to cut a notch for my support piece to sit.

The support piece sits on the cement on one side, and on a support brace under the floor from when I reinforced the corner (after moving the duct). You can see this diagonal floor brace in the upper right of this photo: https://lh3.googleusercontent.com/-IKq2-n4COpM/Tzhgxvn8LLI/AAAAAAAAAJY/fRLLzDBj1pw/s800/P2020162.jpg.

The brace was secured into place, and then my floor pieces added. Pretty cool, right?
I just wanted to point out that I did not escape injury with this project. Nothing major, but it HURT.
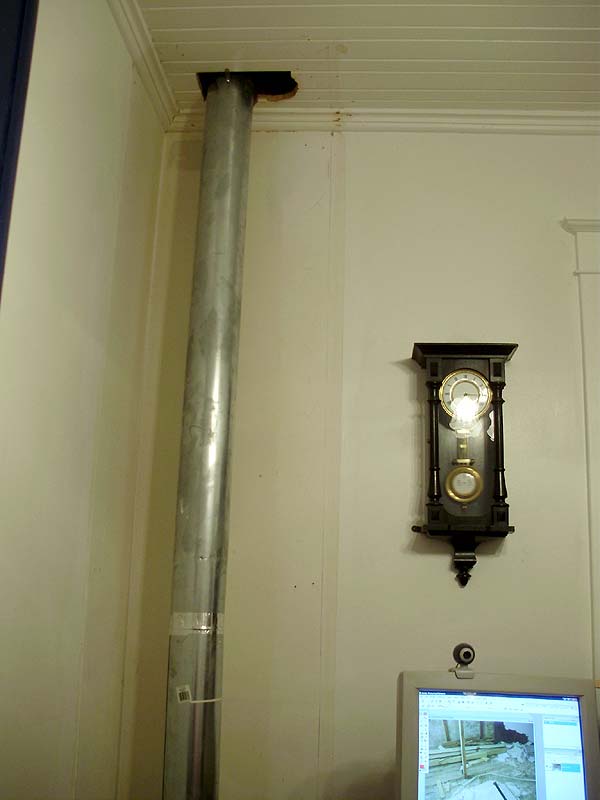
When I was cutting the floor board of this repair:
My reproduction lantern clock fell from my DVD tower right onto the back of my hand. All the vibrations from the cutting tool made it slip off the top. I'm lucky the clock did not break or get badly dented (since my hand will heal, but the clock repair could be very hard to fix). Lesson learned.

Since I had a bunch of wood left, and more than enough to patch-over that floor register, I decided to re-repair the floor grate patch. I REALLY didn't like how those two boards in the middle had turned out, and the floor was also uneven at this spot.
Before:

During:

After (holy crap this makes ALL THE DIFFERENCE!):

Today, I continued fixing electrical boxes in the Living Room. I redid the one next to the cold air returns, the one next to the bookcase (which was FINE! The only one so far! It was solid, AND flush! A true miracle!), then the one next to the old floor grate, and finally, I also had to move the main light switch. The switch was fine with the old crappy casing they had thrown on, but with the correct repro casings, it's too close to the door frame, and there wouldn't be enough room for the cover plate (unless I would cut it, which you can do (and I've had to do it before). I wanted it moved over.
I removed the switch (a dimmer that I had installed a while back), and then remembered how amazingly bad this box was. Again, this is like the one above, where it's hard to see just how crooked it really was. Sticking out 1/4" on the left, and sunk-in about 1/4" on the right. AWFUL. The photo is taken pretty much "head-on".

I added a new wood block, and re-screwed the box. It looks a bit crooked, but it's only because the switch is not actually hooked on yet.


More soon!
I hope to get a bunch of mudding done.
Looks great! When you're done with all the patching on the floor, do you use anything to fill the gaps between the boards? We have some spots in our soft pine kitchen that I'd love to fill, but I'm a little unsure where to start with that.
ReplyDeleteFor nail holes, and the gaps where the boards meet on the ENDS, yes I'll use a filler, but NOT for the cracks in between the boards. I've done a lot of research about old floors and gap-filling products, and the general consensus is to NOT fill them. They look really bad right now, but once they're sanded and refinished they'll look fine.
Delete