
Alright, so I took a closer look at the table. While it doesn't have hand forged hinges, it still has plenty of quirks. One of the first things I looked at, was to compare the turned legs. Often, on older pieces, they will be hand turned. On later pieces they would be done on a copy lathe, or by very skilled craftsmen who could duplicate them very precisely. This set, however, is mind bogglingly (and charmingly) inaccurate. I am not the best at making matched sets by hand, but even I can't understand how they messed this up THIS much.
One leg in particular is quite a bit "off". So much so, that if the leaf is down on that side, the legs look mismatched. See here:
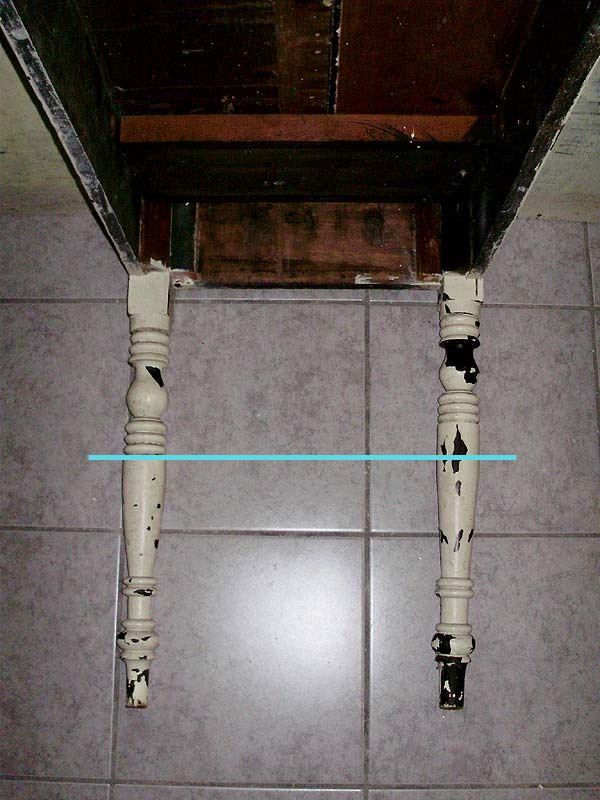
Three of the legs are done like the one on the right, but the one on the left is the "bad" one. The reason I can't understand why they messed it up so bad, is that usually when you make multiples of a pattern, you make yourself a "story stick", which is sort of a pattern that marks all the start/stop locations of each major element on your turned item. Obviously they didn't do this. But like I said: it's a bit charming this way.
L Room Ceiling:
Alright. I've been dreading this job for months, and I wasn't sure which way I was going to do it, and I finally bit the bullet and did it the "better but unsafe" way, which was to remove the "bad" sheet of drywall and replace it. If you want a refresher as to what was going on with this ceiling, go to this post: . Basically, 90% of the ceiling was scraped of the putty easily (haha not really), except for one section about 4x8. On this section, the mud that they smeared on was completely cemented in place. The reason for this, is that they changed the drywall in this 4x8 section, and they added the textured mud directly over the paper. I had 2 choices for fixing this:
1. Carefully remove the 4x8 section, while trying not to fill the house with hundreds of thousands of possibly asbestos-contaminated dust particles from the attic above.
2. Shim-up the entire ceiling to match-up with the uneven thickness of the replaced sheet and leave it alone since it will all be covered up anyways.
As I just mentioned, I went with option 1.
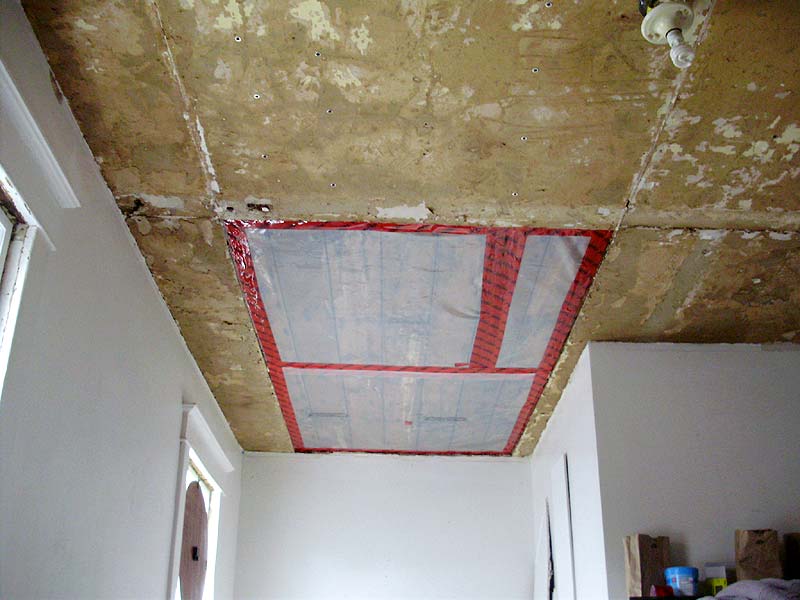
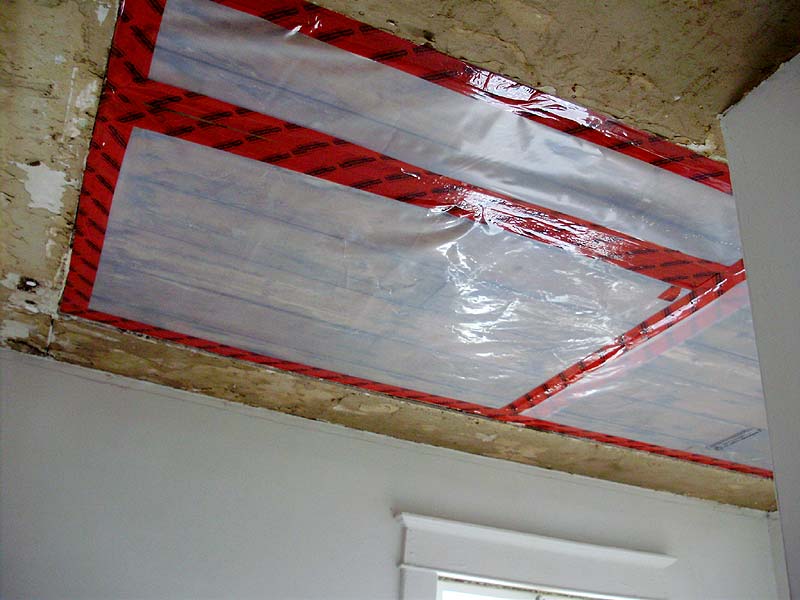
I was nervous as hell, and I did end up dropping a bunch of insulation dust/particles/crumbs all over the floor, but luckily the 4x8 section had been put up in two 4x4 sections, and I was able to contain most of the mess. For reasons unknown, when they removed/replaced the sheet, they also removed the protective layer of thin cardboard that would have PREVENTED the old insulation from trickling down through the cracks in the t-g ceiling. So as soon as I had the sheet off, and the floor vacuumed, I capped it with vapour barrier plastic and sealed all the seams.
Here's what the open ceiling looks like. It's very wide (7") t-g face-nailed to the attic/ceiling joists (which run the whole length of the house).
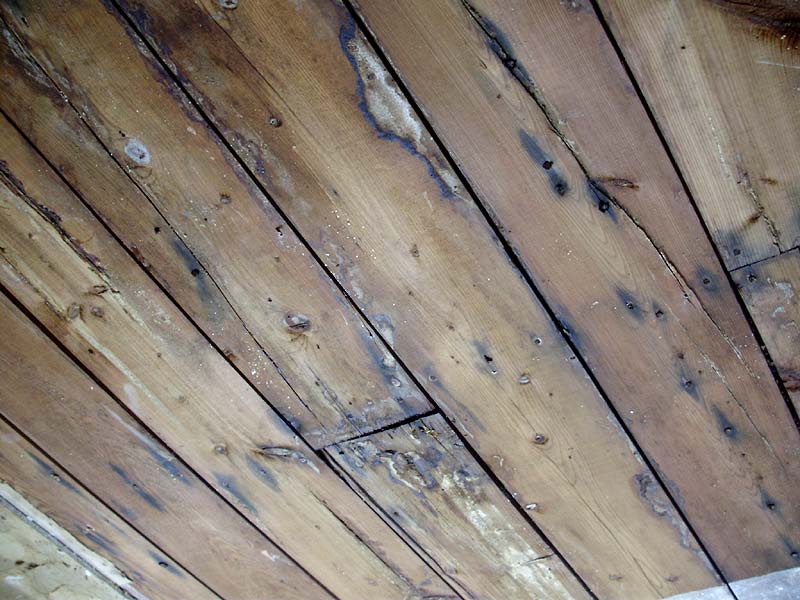
All those little white crumbs are particles of the vermiculite insulation.
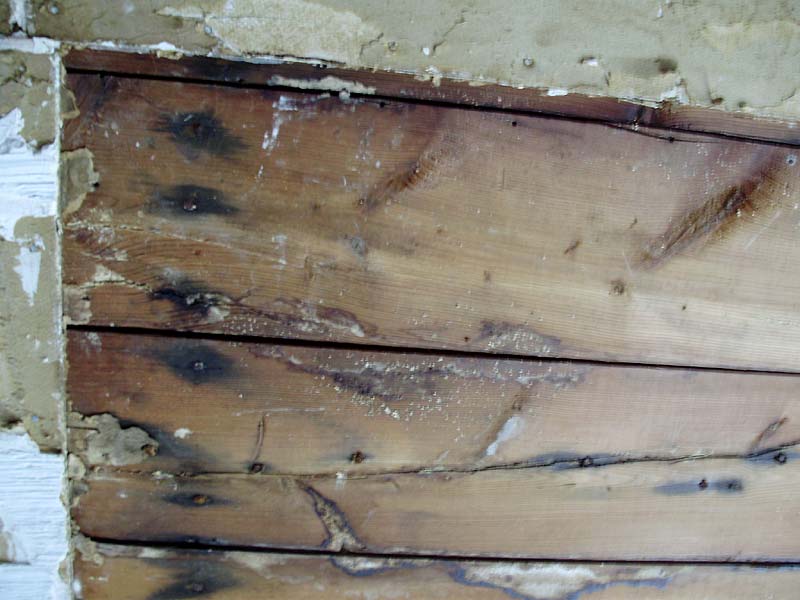
I only felt safe at this point:

The second section went even better, since I was able to loosen 90% of the sheet, and then lean it down just a bit. Then I was able to just vacuum-up all the loose bits on the sheet before taking it down off the edge of the wall (where the corner tape was holding it like a hinge).
Don't even ask me HOW I got this 4x8 sheet of 3/8" drywall up BY MYSELF without breaking it or killing myself. I'll just say that it was a huge PITA.
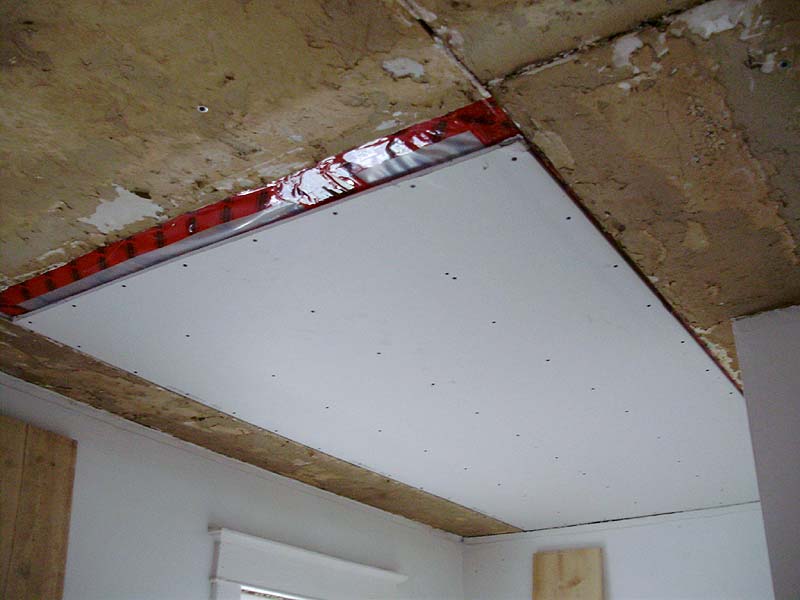
I still need a narrow strip to fill that gap where the tape is visible. When it comes to installing the new (1/2") drywall over this mess, I'll be getting some friends to help out.
Cornwall Homes 4:
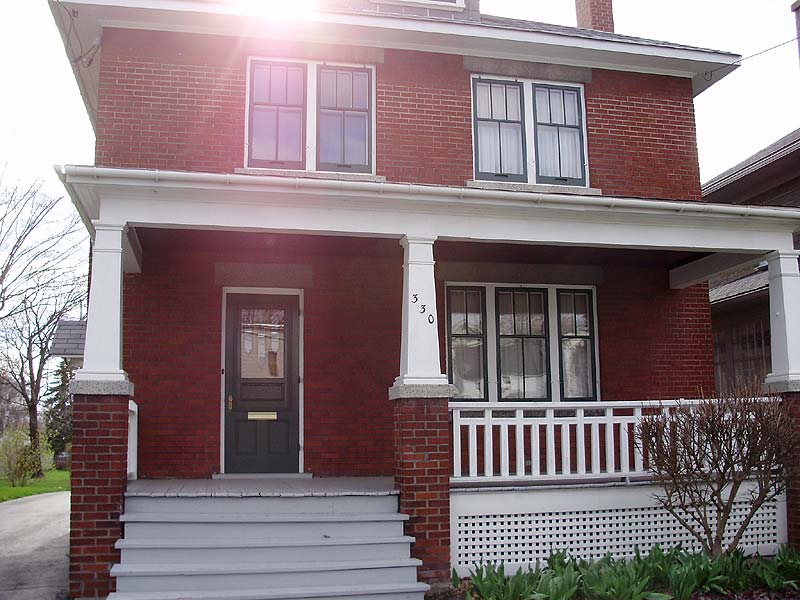
These were taken this afternoon. We'll start with what I consider to be the nicest foursquare in Cornwall. It is in immaculate condition, and boasts ALL of its original windows, original storm windows, original exterior doors, and even the wooden fascia and trim around the roof line. I love that they accented all the storm windows and secondary doors in a classic forest green.
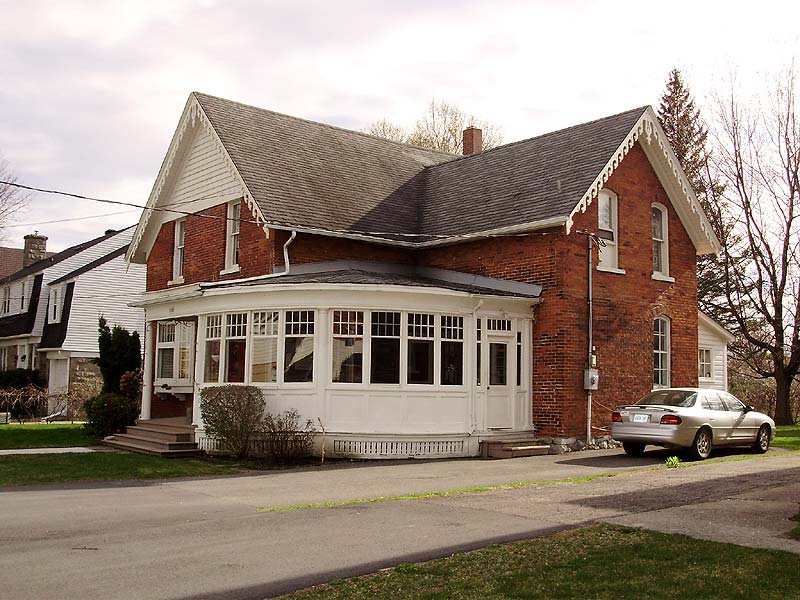
Just next door (2 houses down) is this fine Victorian with a beautiful enclosed circular porch. This house also has all of its original windows, and beautiful (red) arched front doors (not pictured). I love how this photo looks vintage. It was purely caused by the late afternoon sun.
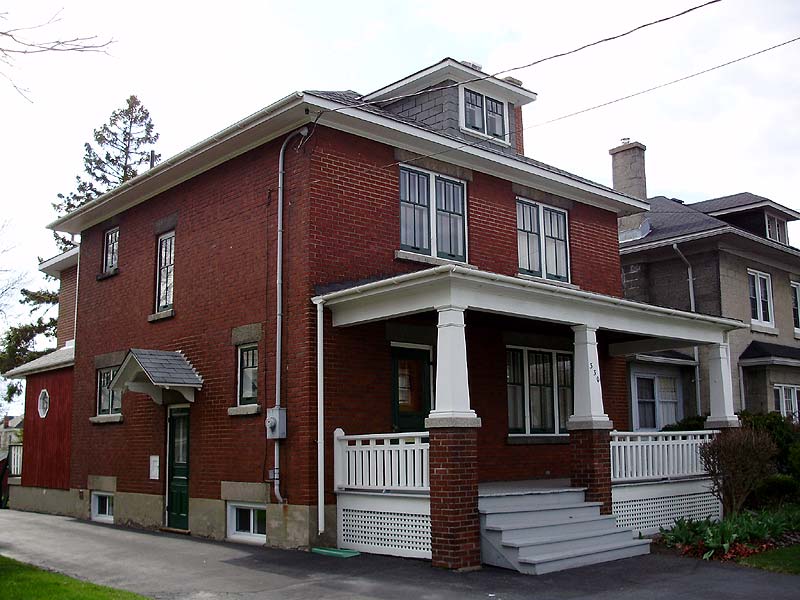
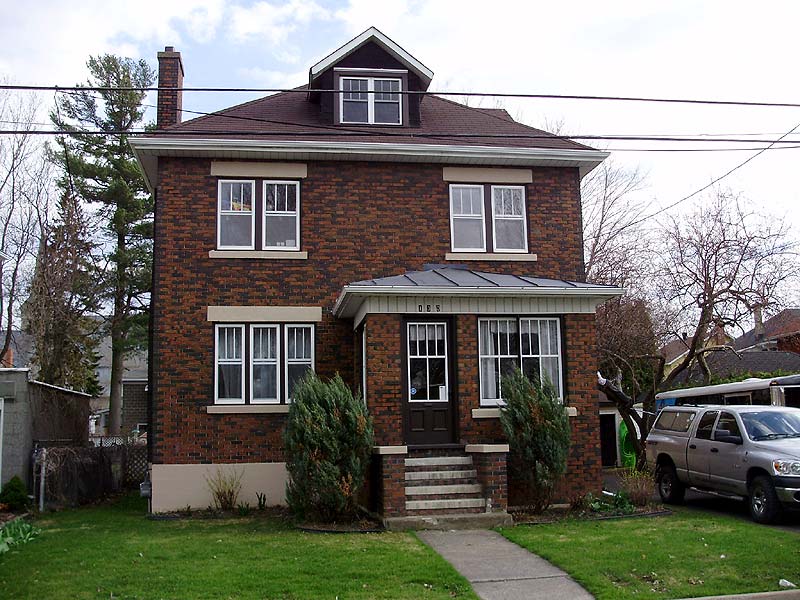
This is another very nice foursquare. I want to make a door for my porch that is similar to theirs, to complement my porch windows (which are also 4 over 2).
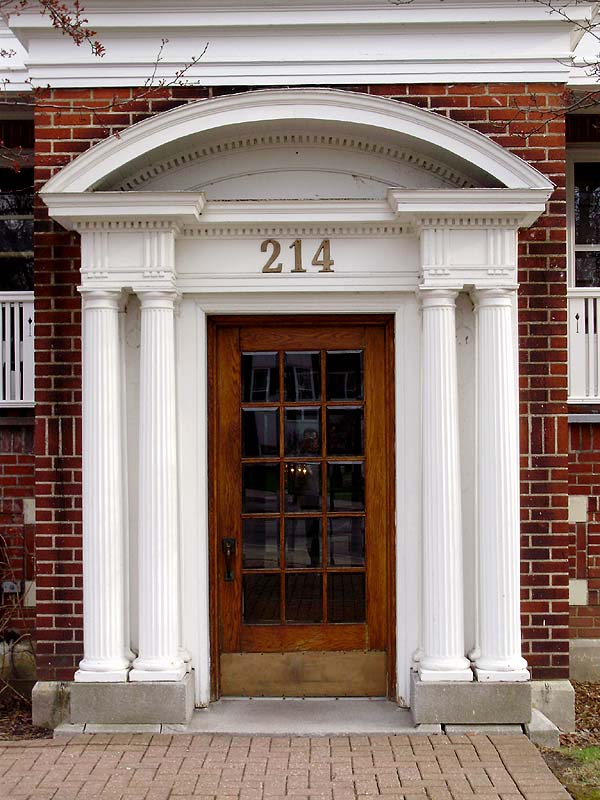
Lastly, this is the grand entrance of a gorgeous apartment building not too far away on one of the main roads. The building has massive fluted columns that span the whole building (3 storeys), and the centre windows are all art deco styled stained glass. The balconies also have nicely detailed wooden railings (which you can partially see on the sides of the photo).
No comments:
Post a Comment